
Integration Test With Database in Golang
Making a test suite in Go projects with a real live database/service
Software testing is a process used to identify the correctness, completeness, and quality of developed computer software. There are so many kinds of software testing. Start from unit-testing, load-testing, stress-testing, integration-testing, UI-testing, e2e-testing, and many more.
Every kind of testing have a different purpose, unit-testing aims to test a single unit of function. Load testing aims to measure how reliable our system against a huge request. And Integration testing aims to ensure our system can integrate with the external services without any issues.
Integration Testing In Go
In this article, I won’t tell any other test except integration testing. This kind test as I said earlier is to ensure that our systems can integrate to external services without any issues.
So with this test, we hope we can avoid any unnecessary error or bug when deploying our applications to the server whatever its environment (staging, production)
So, before moving how to do it in Golang, let me clarify a few things before I explain many things below. Actually, I don’t know that this kind of testing is looking good for many people, but this is how we made an integration testing in our company Kurio (my current company when writing this). If you have an any better idea, it really pleasures if you tell us it in the comment below.
Preparation and Tools
In this article, to make it clear, I’ve listed and prepared a few things as my tools and helper here.
- Docker installed (specifically, docker-compose)
- github.com/stretchr/testify for testing package tools
- github.com/go-redis/redis for Redis driver
- github.com/golang-migrate/migrate for migration package
- etc listed in go.mod
So I will use 2 kinds of database, and my simple application will connect to this database. What I will explain is, how to make an integration testing against to my both database here.
So I will use MySQL and also Redis well, technically we also can say Redis as a database but NoSQL, if it’s not, well just assume it was a database :D.
Test Suite
So let’s say I have a project that depends on both of this database, you can look my entire simple projects here: https://github.com/bxcodec/integration-testing
If you look to packages mysql and redis you will find my function handler to connect to each DB itself and also its file test. Each test was a Suite test. A bundle test that will test my handler. To make a suite test it’s easy, thanks to github.com/stretchr/testify I can do it with ease.
For example, you can look at my redis package. At suite_test.go I define a RedisSuite struct that will be reusable by any test-file.
package redis_test
import (
 "github.com/go-redis/redis"
 "github.com/stretchr/testify/suite"
)
type RedisSuite struct {
 suite.Suite
 Host     string
 Password string
 DB       int
 Client   *redis.Client
}
func (r *RedisSuite) SetupSuite() {
 r.Client = redis.NewClient(&redis.Options{
  Addr:     r.Host,
  Password: r.Password,
  DB:       r.DB,
 })
}
func (r *RedisSuite) TearDownSuite() {
 r.Client.Close()
}
Thanks to testify package, it really helpful to create a suite test. Later with this struct, I just can easily embed it to my test-file. You can see at mycache_test.go
If you look, the cache_test.go file, it’s a bit different with the normal file-test. If in normal test-file we ussually have this pattern:
func TestXXXX (t *testing.T){} // with testing param
It always has the testing param in each test. And it’s required. But in this case, because I use the testify package, there a bit different how to do the test. And it really matters. To add a test case, we must follow the pattern:
func (s TestSuite) TestXXXX(){} //without testing param
For example, in my redis test-file (cache_test.go), you could see that I have 2 test they are: TestSet and TestGet.
Running The Test
To run the test, it still the same as usual. Run it with: go test. But, because this test requires live Databases(MySQL and Redis), at first, we need to run a live database in our testing environment.
If we run the testing in our local, then make sure that our required Databases alive and can access from our local pc. If we run the testing in CI/CD server, then we must provide a live database to fulfill the test.
Luckily, in this modern software engineering era, there was a tool like Docker exists. We can run our database in docker container, so we don’t have to have a real database leave just for testing needs.
To make it easy, I will use the docker-compose feature, look my docker-compose.yaml.
With just command docker-compose up -d, then I will have a 2 database live in a docker-container so that I can test it directly with it.
To ease me, I just make it into a Makefile. So before running my integration-test, I need my database already live in container.
So now, to do my testing I just do it with one command:
$ make integration-test #for integration test
$ make unittest #just for unit-testing
demo integration testing command with make file
Using it With CI/CD (Travis)
Every CI/CD may have different feature. Actually, in my current company (Kurio) we use BuddyWorks as our CI/CD tools, but if I use BuddyWorks here, it will look very easy to do, because, in BuddyWorks, we just drag and drop no scripting :D.
So to make it more fun and more “hacky” and “geeky” that looks very terminal based as many people see us the engineer that only working with the terminal and love the black screen :D, so I decided to use Travis CI/CD for this article :D
Setup the travis.yml script
Before move forward, first, we need to add our project to travis-ci.com and enable the CI/CD pipeline there.
Later, we just need to add our .travis.yml in our project. For my project, you can look all the entire script of .travis.yml in my repository.
Then later, enable it in Travis,
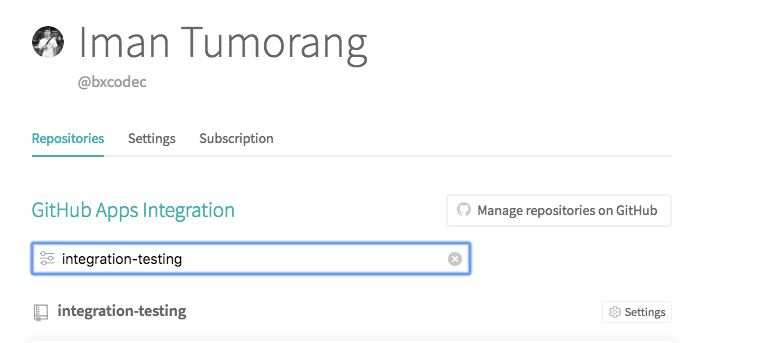
find and enable our repo in Travis
And all will run the test in Travis.
Boilerplate!!!
We just add our TestSuite boilerplate based on Database provider and driver-library into separated packages: You can look it here: https://github.com/golangid/testada
To use this package, for example, you want to make a MySQL integration test, you can directly import the testada/mysql package. And embed directly the MySQL suite structs.
import "github.com/golangid/testada/mysql"
type youItemMysqlTestSuite struct {
 mysql.MysqlSuite //embed from testada/mysql
}
func TestYourItemMysqlSuite(t *testing.T) {
 if testing.Short() {
  t.Skip("Skip you item mysql repository test")
 }
 dsn := os.Getenv("MYSQL_TEST_URL")
 if dsn == "" {
  dsn = "root:root-pass@tcp(localhost:3306)/testing?parseTime=1&loc=Asia%2FJakarta&charset=utf8mb4&collation=utf8mb4_unicode_ci"
 }
 yourItemSuite := &youItemMysqlTestSuite{
  MysqlSuite{
   DSN:                     dsn,
   MigrationLocationFolder: "migrations",
  },
 }
suite.Run(t, yourItemSuite)
}
At least, this package already makes the boilerplate like setting the migration (if using migrations) or handle the test-suite setup that will help you work faster. :D
Also, it’s required to understand how testify/suite works, before implementing your own integration test like ours.
Once again, as I tell at the beginning of this article, this is how we made an integration testing in our company Kurio (my current company when writing this. If you have an any better idea, it really pleasures if you tell me it in the comment below. But if you found this very useful, please share this with anyone who might need this. ^_^
Originally posted at: https://hackernoon.com/integration-test-with-database-in-golang-355dc123fdc9